Showing posts with label Logical Homemaking. Show all posts

Friday, February 14, 2014

Master Bath - Bringing It All Together With Artwork And Accessories


After building and installing the Chunky Floating Shelves and the Between the Studs Storage the rest of the bathroom needed a little help to get up to the same standard. So we updated it with some new artwork, decorative hooks, a few accessories and a plush mat. Most of the items we already had around the house. There were a couple purchases made from Marshalls that helped tie it all together.


Artwork:
To balance the left side of the vanity with the right side I decided it needed a little pizzaz and thought some brown frames would do the trick. I found the two prints at Marshalls and fell in love with them almost instantly. I knew this is what the bathroom needed!


< Side Note: Jonathan probably wouldn't agree with the word "needed"
but they couldn't be more perfect for the space - don't you agree? >


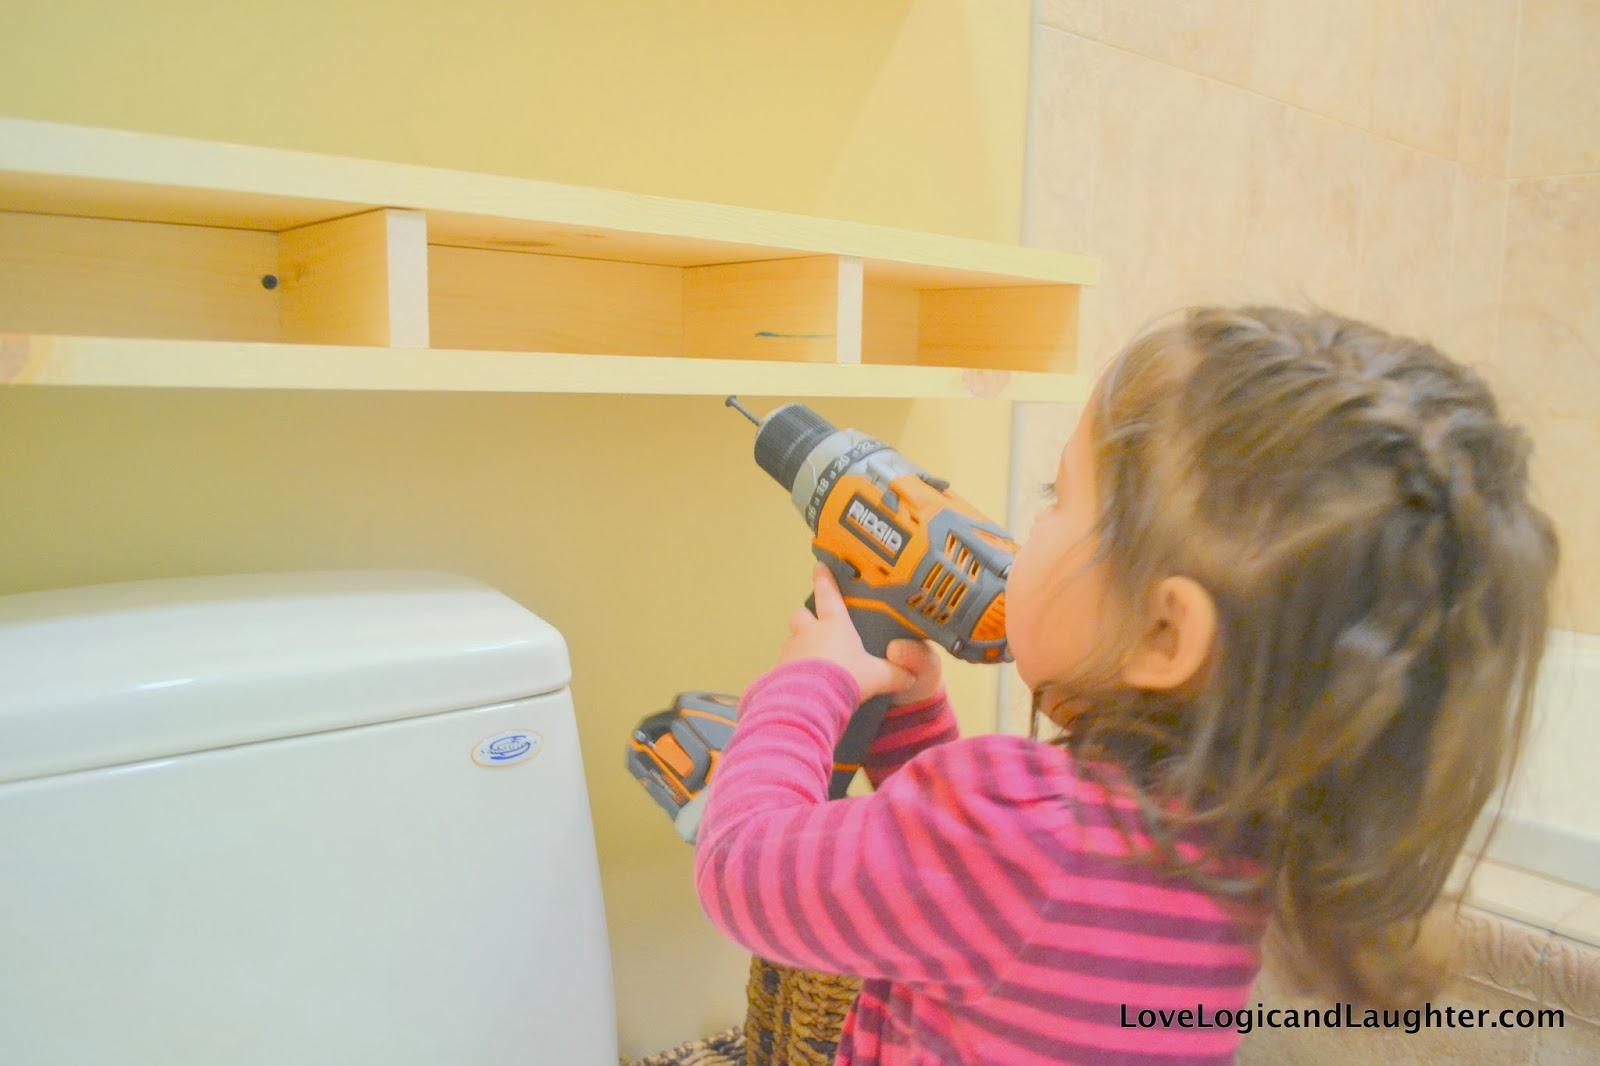
I think they do a good job of making the Between the Studs Storage work in the space and I am finally starting to fall in love with the new unit.


We had the frame below. I added some bright family photos from the pool and beach because I seem to love either 1. naked 2. bathing suit or 3. beach photos in bathrooms. I am not sure why, but they just seem appropriate in bathrooms? Is this just me?


The hooks below the photo were found also at Marshalls for $6. They fit in the space behind the bathroom door so well. It is a small wall but you can see the reflection of it in the mirror when you enter the bathroom.  It is fun to know there is something fun to welcome you when you enter the bathroom and turn around to look at the opposite wall.

Accessories:


We had the tray, mirror and bird bowl. I found the mercury glass soap dispenser at Target.


I love combining things into groups to make an impact. They add a little sparkle to the countertop and it is great because they are now the only things on the counter since we built the storage unit into the wall.


We also already had this towel bar (it is actually a toilet paper holder) and I hung it to the right of the sink. It is nice to have a place to dry hands - for some reason we didn't have a place for a hand towel in the bathroom and I was always reaching for a bath towel to dry my hands.


This plush bath mat (below) makes stepping into the bathroom feel wonderful in the mornings.


There is one vent in the bathroom. It sits below the window. So we hung a towel bar below the window and call it our towel warmer ;-). Probably the cheapest towel warmer on the market, but it actually works! You just have to time your shower around when the furnace decides to kick on...


So that's it!  The master bath ensuite is just about finished.  There is only one thing left and that is to update the brass shower fixtures to chrome.  I have them ordered and they should arrive in about two weeks.  Other than that we have an updated master bath!  I love coming into it now in the mornings and evenings.  It isn't big but it has just enough touch of luxury that it makes it feel special.

Tuesday, February 11, 2014

How We [Kinda] Got The Look Of A Large Rug For A Smaller Price


We love the original hardwood floors in our home.  It is one of the many reasons we fell in love with this house - for its character.  We were fortunate to find these floors under the carpet shortly after moving in.  What we didn't anticipate was the price of purchasing area rugs for every room of the house.  They are hundreds to thousands of dollars!  So some rooms got outfitted with hand-me-down rugs and for others we got creative.  


For the nursery, I found these two rugs at Kohl's on sale for $15/piece.  A great deal!!!  And while they do not match each other perfectly, they coordinate well enough to sit side by side and create the illusion of a larger rug in the room.

Good Morning Sunshing!  I took these photos right after Eliana woke up one morning.
I like that they are separated by a few inches, but I could have pushed them right up next to each other to really make it look like a bigger rug.


The next area of the house we plan to put a rug is on the stairs.  While we love the hardwood stairs, we have had 1 too many people fall down them while wearing socks.  We are planning on using a runner and I have had my eyes on a store in Pittsburgh that sells carpet remnants for hopefully the perfect piece. We'll see if I find one soon!

Saturday, January 18, 2014

DIY Chunky Floating Shelves - Final Photos with Shelf Vignettes


The shelves are done and decorated!  I am in love with them!  I had a hard time photographing them - my lighting wasn't great.  What do you think?


Here they are without any items on them yet:


And here they are loaded up with supplies and "spa-like" items.  :-)  The tall container on the left top shelf contains a candle.  The aged bronze container next to it holds extra toilet paper rolls and then a clock and a photo of Jonathan and I on our wedding day.  On the lower shelf there are extra towels (I wish I could say they were plush, but they aren't...we need new towels) and a small basket containing feminine care items.

Option #1:

Option #2: Instead of the clock, there is a picture hung on the wall and a mirror on the shelf.

Which vignette do you like best?  Option #1 or Option #2?

You can see that they are next to the shower/tub area of the bathroom:


If you continue to scan right in the room, you will see our vanity below on the right.


The only thing we have added to this area of the bathroom (below) are the glass shelves on the wall to the right.  I am not a huge fan of those shelves, but they work for now...

This shot is taken from the doorway into the bathroom (see the door on the right of the photo)
Remaining on this bathroom "To-Do List" is:

1. Frame the mirror above the vanity
2. Replace or find a way to update the light above the mirror
3. Possibly build a different shelving unit between the wall studs where the current glass shelves rest.

Next Post: Tutorial to make your own Chunky Floating Shelves

Before:

After:

Option #2:

Option #1

Close-ups and Detailed Photos:


How have you added storage to your bathroom?  Would you consider making floating shelves?

One more question:  Do you think I should add a third shelf?  I am torn...

Friday, January 17, 2014

Chunky Floating Shelves and Adding Storage to a Small Bath


Our Master Bath is pretty small when you compare it to Master Bathroom's in newly built homes.  A master bath (or "ensuite") wasn't an important component when checking off "must-haves" while house hunting.  If the master bedroom included an ensuite, then we were getting more than what we needed.

So hurray for a master bath!


Our master bathroom was probably the most updated room in the house when we bought it.  It had new tile, a new jacuzzi tub, adequate stock cabinets and new countertops.  I love the tiling job in the bathroom - they did a great job choosing neutral colored tile while adding detailed trim tile.  The photo above shows our toilet sitting next to the tub/shower....pretty bare and in need of some jazzing up!  We really could use more storage in the bathroom and above the toilet looked like the answer.  Who couldn't use more storage in their bathroom?

...Well, maybe these people...

So until the day we have a bath like the one above, we needed another solution...

There were a couple things I knew that I wanted: 

1.  Floating "Spa Like" Shelves - Who doesn't want there bath to look "spa like"?
2.  Custom Built - They would need to be custom built because I wanted them a specific length
3.  Substantial - Not thin pieces of wood that looked flimsy  

I was inspired by these DIY'ers and bloggers:

From Desert Domicile

From Bower Power
So with the above inspirations and DIY plans in mind I started building.  Actually, I put Eliana to work...       Just kidding, but she almost has the hang of it after watching me project after project.  She put the screw in backwards, but has the general idea of how the drill works.  Good Job Eliana! 


I will post detailed directions on how I built my floating shelves with lumber, cut list and dimensions soon!


I got the skeleton of the shelves onto the wall and was happy with the placement and size so far.  I then added fronts to the shelves (and got to use my new table saw to rip these pieces to the exact size I needed!)  Then added painters tape and started mapping out how to finish these - stain or paint?


 I placed a few items on the shelves to get an idea of how they were going to look finished (and because I was excited with how they were turning out).  I ended up deciding to go with stain - I fell in love with those inspirations photos above so why change it up?


I started with dark walnut stain.  Not dark enough...


So for the next layer of stain I applied Red Mahogany.  Getting there, but you could still see too many knots and grain in the wood for what I wanted...


So then I moved onto PolyShades.  I had recently read an article at Young House Love on how they had used PolyShades on their updated bathroom vanitykitchen cabinets and stairs with success so I decided to give it a try...

Much better!  I used PolyShades in American Chestnut Satin:

The can recommends at least two coats so after a second coat I got exactly what I wanted!


They are currently drying upstairs as I write this post.  I can't wait for them to finish so I can remove the tape and start styling them.  I will post the finished project and a tutorial on building floating chunky shelves soon!

Wednesday, January 8, 2014

Organizing and Labeling Wine with Colored Rubber Bands


Welcome to our wine cellar!  Well, it is not actually a cellar, but maybe someday......  It is a wine cabinet that I fell in love with while my husband and I were shopping for a bedroom dresser.  Who needs a dresser when you can have one of these instead, right?


Recently my sister moved in with us.  It has been wonderful...but I did drink one of her nice bottles of wine she was saving for another event...oops!  Of course she said she didn't mind, but I still felt bad.  I decided we needed a system.  Since then it has been nice because if we have people/family over, I can tell them to open any bottle except the ones with a rubber band on them.


It has been a great system for myself as well.  Have you ever bought a bottle of wine that you want to try but then later can't remember which one was the nice one and which ones were the "any night of the week" wines?  Now, when I come home from the liquor store I place a rubber band over the nicer bottles so that I know they are special.


We keep a ball of rubber bands (you can get these at any office or big box store) on the shelf near the wine glasses.

If you have multiple people storing wine in the same cabinet than you could label certain color rubber bands for certain people.  For example, the purple bands for one person, the yellow for another and green for another.  That way you know who bought which wines.  


So rather than locking up your wine cabinet (unless you have teenagers in the house and then maybe you should ;-) you can just use the rubber band system!


 At some point I would also like to label each of those cubbies for wine for types of wine.  Such as Cabernet, Chianti, Chardonnay, etc.


Tuesday, December 17, 2013

Decorating Our Tree - Through a Child's Eyes


There is something spectacular about watching a child at Christmas!  You relive the many miracles of this time of year through their eyes.


We have a family tradition where we eat appetizers, listen to Christmas music and decorate the tree together as a family.  It is one of the only times that Eliana is allowed to eat anywhere outside the kitchen.  That fact by itself makes it a special tradition!


This tradition is even extra special this year because one of Eliana's favorite Christmas decorations is Christmas trees.  We have several throughout our house - most are fake, but this one is real and we had so much fun decorating it and watching the magic of Christmas build in Eliana's eyes!


We kept the food simple:

Toasted Coconut Chicken with a Sweet Chili Sauce
Turkey Brie and Apricot Flatbread
Goat Cheese Pinwheels with Carrots and Zucchini
Grapes

Wine and Milk (Milk for Eliana)


Eliana excited about getting to eat in the living room!


The best part was watching Eliana and Jonathan decorate the tree together.


We don't have a perfect tree.  And we definitely do not decorate it perfectly.  We haphazardly place ornaments on branches and the main things we look for when we hang an ornament is: 1. Will it stay on the branch? 2. Will it pull the branch down too far?  If it passes those two questions/pieces of criteria then it stays where it was put.