Showing posts with label Child Made. Show all posts

Friday, December 20, 2013

DIY Child Made Thank You Cards


We are blessed to have wonderful family and friends surround us!  Eliana was showered with love and presents for her birthday.  We wanted to show our appreciation, but Eliana isn't old enough to write her own thank you cards yet.  So we did the next best thing - she decorated the cards and I wrote them!


We hung cardstock paper on our magnetic chalkboard, supplied lots of paint and brushes and Eliana used her artistic abilities to create these wonderful pieces of art :-)


Each is one-of-a-kind!


You know how Hallmark has the tiny print on the back of their cards marking their name?  Well, we did this:


How we did it:

1. Get Creative: Eliana got into her artistic groovy mindset.


2. Paint white cardstock paper:  We used our vertical magnetic chalkboard.


3. Supply lots of glitter paint!


4. Re-supply paper:  As soon as the sheets were painted I switched them out for two new sheets.  I hung the drying sheets on the other vertical magnetic board - it was soon filled!


5. Wait for the artwork to dry overnight:  I then put it under a rug with some books on top to make sure they weren't warped.

6. Cut the sheets of paper in half using a paper cutter: I love this thing.  I use it all the time!


7. Fold the half sheets of paper in half and write a message on the inside.


8. Write "Made With Love" on the back bottom.


8. Place them in store bought envelopes: We got ours at Staples.


Our addressed envelopes - we chose the "assorted brights" color:

9. Admire your work.


10. Mail your Thank You Cards!

Thursday, December 19, 2013

DIY Wrapping Paper


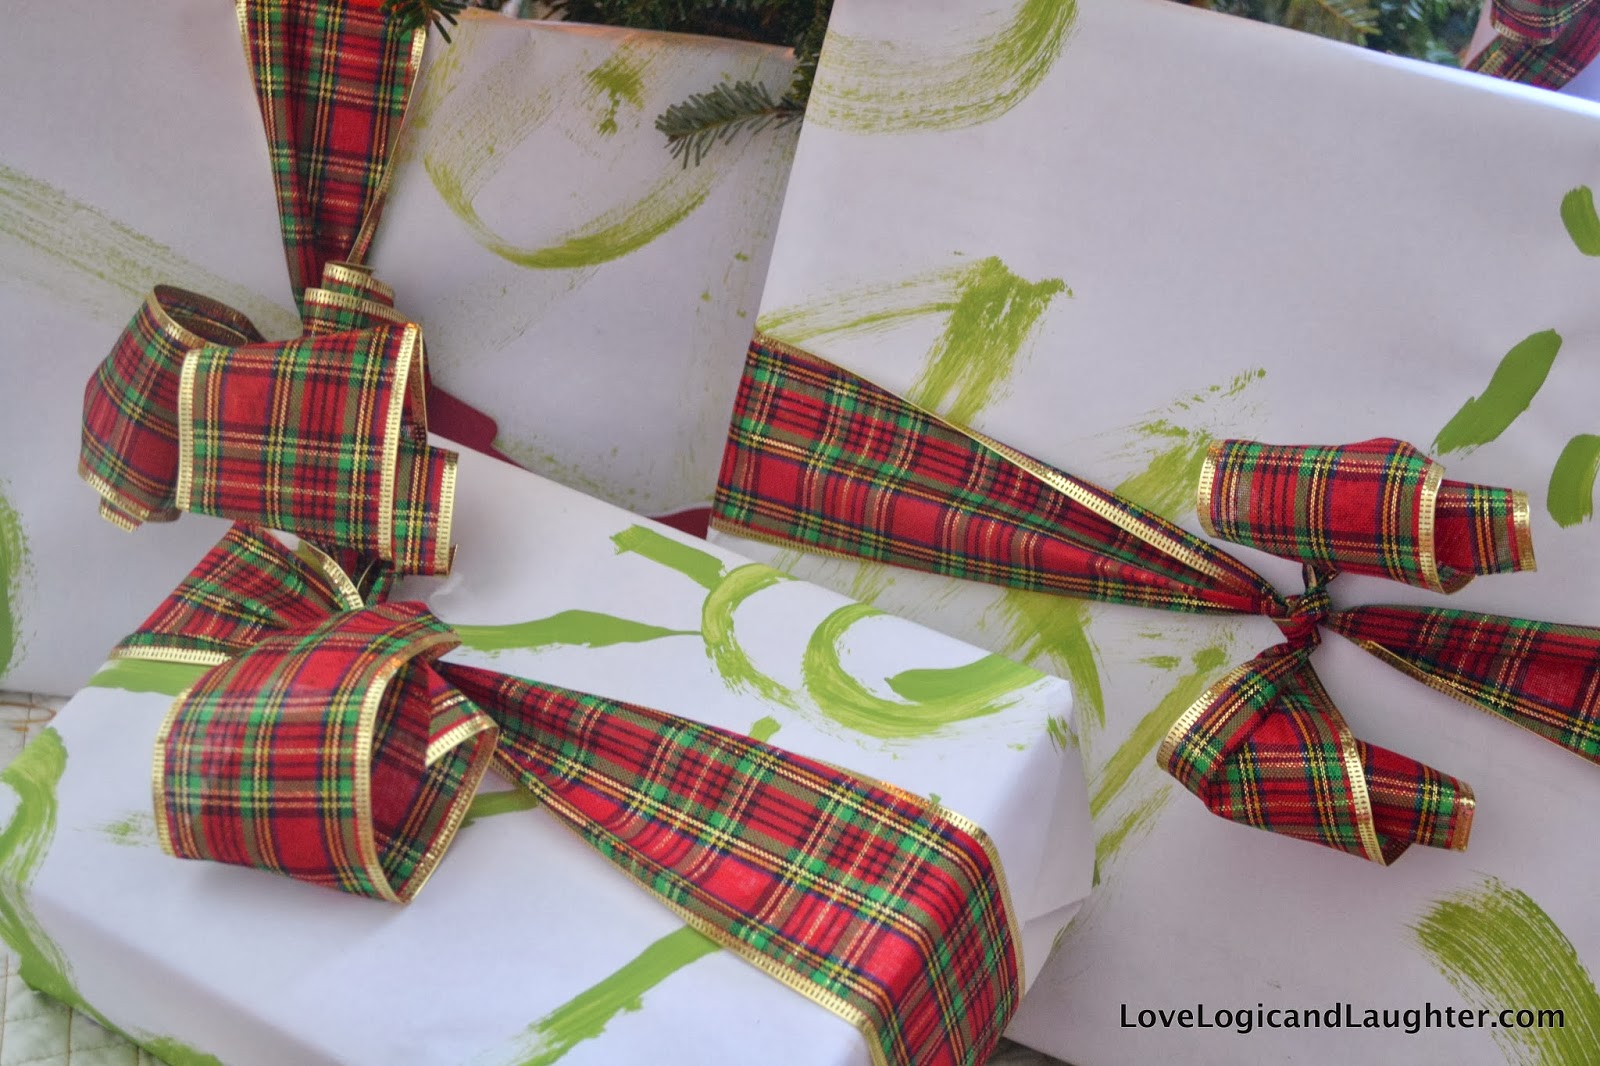
Our homemade, or better yet, "Child Made" wrapping paper looks a little bit like modern art - freeform shapes and lines that intersect in beautiful disarray!


It looks a little bit like our Child Made Thank You Cards except we only used red white and green paint for this art project.


It is a fun way for a child to give a gift that is from them.  Eliana is currently using the phrase, "Eliana Give It!" for gifting presents to others - she uses the phrase for most of the presents we wrap.


We decorated both brown and white rolls of paper - here they are tucked under the tree!

How we did it:

Buy plain rolls of paper:  We bought both brown and white.  You can find these at any office store (we found ours at Target and Staples).


Plan out your space:  We painted on our kitchen peninsula and kept moving Eliana from one side of the peninsula to the other so that she could decorate both sides of the paper (she couldn't reach all the way across from the one side.  You also need to have space to continually unroll the paper as the paint goes on.  We didn't have enough space to paint an entire roll in one sitting.  We painted about a third of a roll per painting session.


Provide child friendly paints and brushes: We used red white and green for our projects because we were making Christmas wrapping paper.


Get Creative: We painted some parts of the paper and stamped our hands for other parts of the paper.  You could also use foam stamps, toilet paper rolls or cookie cutters to make other shapes on the paper.


This was a fun project to do with Daddy - we had it all set up and ready to do together when he got home from work! 

Daddy did a good job wiping up the extra globs of paint Eliana would leave behind - he periodically put her initials on the paper with the extra globs of paint.

Allow time for the paper to dry:  We let our paper dry overnight.  Then roll it back up so that it looks like a roll of wrapping paper again.

When painting with a 2 year old the paint gets thick in areas - so allow plenty of time to dry!
Wrap your presents:  This paper is especially fun for gifts that are from children.  We added ribbon to the wrapped gifts to finish them off!


We painted in two sessions - one with the white paper and one with the brown paper.  During the brown paper painting session, Eliana's Uncle Thomas came to participate along with his girlfriend.  After painting her own hand and putting it on the paper, she loved painting their hands and stamping them on the paper too!  Everyone got messy, but everyone had fun!  It really can be a project for all ages!

Painting Uncle Thomas' hand:
Painting Samantha's hand:

 Part of the finished product from the brown paper:


And then just for fun, painting Uncle Thomas' fingernails (because Uncles are cool like that) :-p

Ready to be opened Christmas morning!


Friday, November 1, 2013

Toddlers Costumes and Pumpkins


 A Toddler Halloween Party:

Costume Wearing
Pumpkin Painting
Good Food Eating
Fun Friends Playing


We had good friends over on Halloween for a fun filled get together.  This group of friends meets frequently at either someone's house, the zoo or a park.   Because this day happened to also be Halloween we filled it with pumpkin painting and costume wearing fun!

   
 This is what you get with 9 toddlers painting pumpkins at once:


Fortunately, all of these Moms were totally OK with a little mess!
~ plus we used only washable paint :-) ~


We lined them up on the couch and tried to get pictures:


 Try as we may, we never got all 9 on the couch at the same time... one would escape and another would be placed in their spot :-)


And then we enjoyed some good food around the table!


We had to extend the dining room table for this bunch of good eaters!


A Hot Apple Cider Bar was set up for a fun seasonal drink:

For more on the Apple Cider Bar look HERE

Thanks everyone for helping out - bringing food and goodies to help celebrate!

Check out last year's Costume Line-Up on the couch:


Before 9 Toddlers Starting Painting:


After 9 Toddlers Painted:

Tip: Before painting the pumpkins spray them with a sealer - otherwise when the paint dries it will peel.  I used Aleene's Spray Acrylic Sealer - Matte Finish.  I sprayed them one day in advance and let them dry.


This is what happens when the pumpkin is not sealed:  Lesson learned last year when we also painted a pumpkin


More action shots:


Happy Halloween and Happy Fall!!!